How to Set Up a New Smart TV the Right Way?
Getting a new smart TV is exciting. But that excitement can fade fast if setup goes wrong.
Many people rush to power on their new TV right away. This often leads to messy cables, wrong mounting spots, or frustrating remote issues later.
The good news? You can avoid all of that.
Setting up your smart TV the right way is simple when you follow the correct order. It starts before you even turn the TV on.
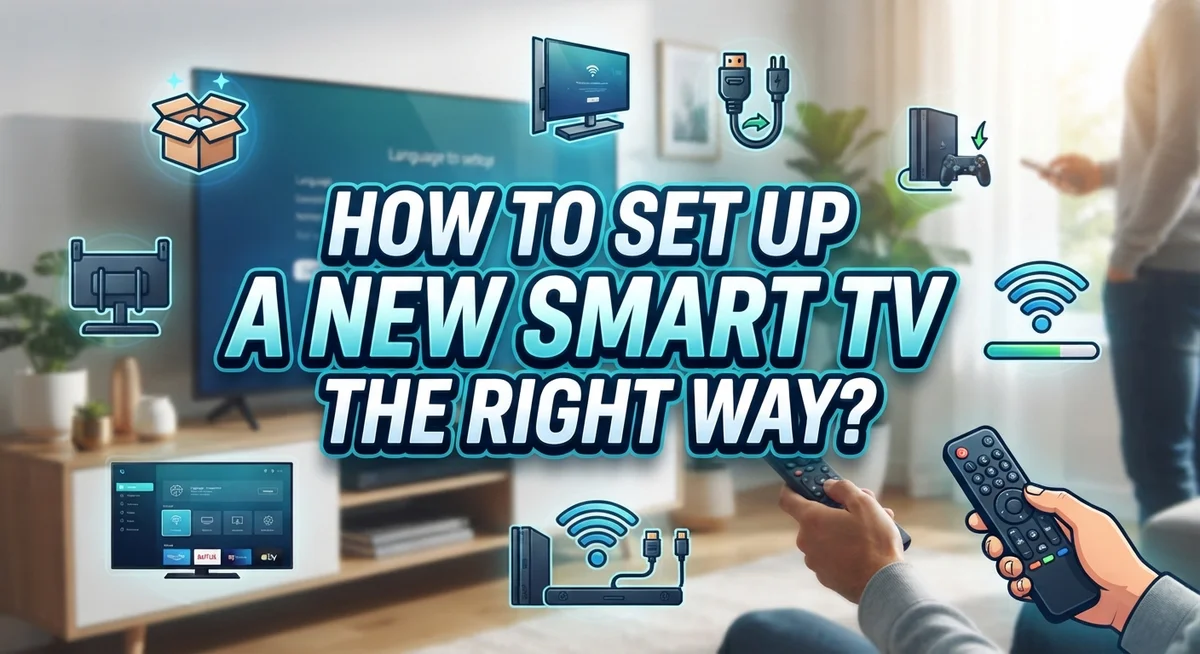
This guide walks you through every step. You will learn how to plan your TV location and connect external devices like your cable box or game console first.
We will also cover pairing your remote, connecting to Wi Fi, and adding your account for a smooth first time experience.
Along the way, we will point out common mistakes people make. Things like mounting too high or tossing the original box too soon.
By the end, you will know exactly how to troubleshoot small hiccups too. This includes resetting inputs or power cycling your TV.
Let’s get your new smart TV ready the smart way.
In a Nutshell
Here’s a quick summary to keep handy while you set up your new TV.
-
Plan the location first. Pick a spot with good viewing angles and easy access to power outlets before you unbox anything.
-
Connect all external devices first. Plug in your cable box, game console, or home theatre system before you power on the TV.
-
Pair your remote properly. Point it directly at the TV and follow the on screen prompts to link them.
-
Connect to Wi Fi early. This lets your TV update software and prepares it for streaming apps right away.
-
Add your account details. This step unlocks personalized settings and access to your favorite apps.
-
Avoid common mistakes. Skip mounting too high, using wrong hardware, or tossing the original box too soon.
Small hiccups are normal. A quick power cycle or fresh batteries in your remote often fixes most issues. Keep these steps in order, and your smart TV will be ready to enjoy in no time.
Planning the Perfect TV Location Before You Begin
Finding the right spot for your smart TV makes a huge difference in your viewing experience. Start by thinking about where you spend the most time in your room. This is usually where your TV should go.
Eye level is your friend. When you sit in your favorite chair, your eyes should naturally fall on the center of the screen. If you mount too high, you’ll strain your neck during long viewing sessions. If you place it too low, you’ll feel uncomfortable watching for extended periods.
Check the distance from your seating area to where the TV will hang or stand. A general rule is to sit about 1.5 times the screen width away from your TV. This distance helps you see all the details without moving your eyes around too much.
Look for wall studs before mounting. If you plan to hang your TV on the wall, locate the studs behind your drywall first. Studs provide the solid support your TV needs. Mounting on drywall alone can cause your TV to fall over time.
Make sure you have easy access to a power outlet nearby. You don’t want cables stretching across your room or behind furniture where they can overheat. Also consider natural light in the room. Windows and bright lamps create glare on the screen, so pick a spot away from direct sunlight when possible.
Think about cable management too. Plan where your cable box, internet router, and other devices will sit. Having everything close together makes setup faster and keeps your space organized.
Take a few minutes to measure and plan now. This simple step prevents frustration and costly mistakes later.
Mounting or Placing Your Smart TV Safely
Mounting or placing your smart TV safely requires careful planning and the right approach. Your TV is a valuable investment, so taking time to do this correctly pays off.
Start by choosing a location with a sturdy, level surface or wall. If you’re mounting on a wall, locate the wall studs first. Studs provide the solid support your TV needs. Use a stud finder to mark them before drilling any holes.
Use the correct mounting hardware for your TV’s weight and size. Check your TV’s manual for the exact specifications. Mismatched hardware can cause your TV to fall, which is dangerous and expensive.
Mount your TV at a comfortable viewing height. Many people mount TVs too high, which causes neck strain. Your eyes should naturally look straight ahead or slightly down when seated in your favorite spot.
If you’re using a TV stand instead of wall mounting, place it on a flat, stable surface away from edges. Make sure the stand won’t tip over if someone bumps it. Keep the TV away from direct sunlight and heat sources like vents or radiators.
Plan your cable routing before you mount anything. Run cables through cable management sleeves or behind the TV to keep your space looking clean. Leave some slack in cables so you can access devices easily later.
Before you power on your TV, connect all external devices like cable boxes, game consoles, and home theatre systems. This prevents confusion during setup and makes your first experience smooth.
Check that your power outlet is within reach of your TV’s cord. Avoid using extension cords if possible. Keep the original box and packaging for at least the first year in case you need to move or return your TV.
Connecting External Devices the Right Way
When you connect external devices to your smart TV, the order matters. Connect everything before you power on the TV for the first time. This approach prevents software conflicts and makes setup smoother.
Start by identifying all the devices you want to attach. Common options include cable boxes, Blu ray players, game consoles, and home theatre systems. Each device needs its own HDMI cable or appropriate connection type.
Check your TV’s back panel first. Count the available HDMI ports and note any other connection options like USB, optical audio, or ethernet ports. This tells you what devices you can connect simultaneously.
Plug each external device into the correct port. Label your cables if you have multiple devices. This makes future troubleshooting easier. If your TV has limited HDMI ports, consider using an HDMI switcher to connect more devices.
Don’t forget about power cords. Make sure each external device has access to a nearby power outlet. Arrange cables behind your TV stand or along the wall to keep things organized and safe.
Check all cable connections are secure. Loose connections cause picture problems or no signal at all. Push each cable firmly into its port until you hear or feel it click into place.
If you’re using a home theatre system, connect it to your TV’s audio output port. This ensures sound travels from your TV to your speakers properly.
Only after every device is physically connected should you plug in your TV and power it on. Your TV will recognize the connected devices during startup. This setup order saves you from connection headaches later.
Step-by-Step: Powering On and Initial Configuration
Now that your TV is positioned and all external devices are connected, you’re ready to power it on. This is where the actual configuration begins.
Plug your TV into the power outlet. Press the power button on the remote or the TV itself. The screen will light up, and you’ll see startup messages appear. Wait a moment for the TV to fully boot up. This usually takes 30 to 60 seconds.
The TV will guide you through an initial setup wizard. Follow the on screen prompts carefully. The system will ask you to select your language and region first. Choose the options that match your location and preferences.
Next, you’ll pair your remote with the TV. Point the remote at the TV and follow the pairing instructions. This step ensures your remote communicates properly with the TV. Hold the remote close to the TV during this process for best results.
After remote pairing, the TV will prompt you to connect to Wi Fi. Select your home network from the available list. Enter your Wi Fi password when asked. A strong internet connection is essential for streaming apps and software updates.
Once you’re online, the TV will ask you to sign in or create an account. This account links to your TV brand and unlocks features like app stores and personalized settings. Use your email address to create or access your account.
Don’t rush through these steps. Take time to read each prompt and make selections that work for you. If something seems unclear, pause and review the TV’s help menu or manual. Completing setup properly now prevents frustration later.
Pairing the Remote and Connecting to Wi-Fi
Your remote and Wi-Fi connection are the two most important things to set up after powering on your TV. These let you control your TV and access all the content you want to watch.
Pairing your remote starts immediately after you turn on your TV. The setup wizard will guide you through this step. Most remotes pair automatically by pointing at the TV and pressing a button. Hold the remote about 6 to 12 inches from the TV screen. Press the button the wizard tells you to press. The TV will confirm when pairing is complete.
If your remote doesn’t pair the first time, check the batteries. Replace them with fresh ones and try again. Make sure you’re pointing the remote directly at the TV’s sensor. Some remotes have a dedicated pairing button on the back. Check your TV’s manual if automatic pairing doesn’t work.
After remote pairing, connecting to Wi-Fi comes next. The TV will show you a list of available networks in your area. Find your home network name in the list and select it. The TV will ask for your Wi-Fi password. Type it carefully using the remote. Passwords are case sensitive, so pay attention to capital and lowercase letters.
Once connected, your TV will verify the internet connection. This usually takes 30 seconds to 2 minutes. A successful connection means you can now access streaming apps and online features.
If Wi-Fi connection fails, move closer to your router. Walls and distance can weaken your signal. You can also restart your router by unplugging it for 30 seconds, then plugging it back in. Try connecting again after your router restarts.
Optimizing Display and Account Settings
After your remote pairs and Wi-Fi connects, focus on display settings. These adjustments make a real difference in how your TV looks and performs every day.
Start by accessing the display menu. You’ll find this in your TV’s main settings. Look for options labeled “Picture,” “Display,” or “Video Settings.” This is where you control brightness, contrast, and color.
Brightness controls how light or dark your screen appears. Set it to a comfortable level for your room’s lighting. If your space is very bright during the day, increase brightness. For darker rooms, lower it to avoid eye strain. Don’t max out brightness, as this wastes energy and can shorten your TV’s lifespan.
Contrast adjusts the difference between light and dark areas. A good starting point is around 50 percent. Adjust from there based on what looks natural to you. Colors should pop without looking fake or oversaturated.
Next, check color temperature settings. Most TVs offer “Warm,” “Cool,” or “Standard” options. Warm settings add yellow tones and feel easier on the eyes. Cool settings add blue tones for a crisper look. Choose what feels right for your viewing habits.
Look for motion smoothing or “TruMotion” features. These can make sports and action scenes look smoother. Some people prefer this on, others find it distracting. Test both settings to decide.
Finally, add your account information. This unlocks streaming apps, saves your preferences, and syncs content across devices. Enter your email and password carefully. Your TV now remembers your settings, so future adjustments happen faster.
Common Setup Mistakes to Avoid
Planning your TV location matters more than most people realize. Choose a spot where you can watch comfortably without straining your neck. The viewing distance should be about 1.5 times the screen width. Avoid placing your TV in direct sunlight, which creates glare and reduces picture quality.
Before you mount your TV, locate the wall studs in your home. Wall studs provide the structural support your TV needs. Use a stud finder to mark their exact locations. This step prevents your TV from falling and keeps it secure for years.
Using the wrong mounting hardware is a costly mistake. Check your TV’s weight and VESA compatibility first. Your mounting bracket must support your TV’s specific weight and size. Incorrect hardware can damage your wall and your TV.
Mounting your TV too high forces you to look up constantly. This causes neck pain and reduces your viewing enjoyment. Mount it at eye level when you’re sitting down. Your eyes should naturally look straight ahead at the center of the screen.
Keep your original TV box and packaging. You’ll need it if you move, travel, or need to return your TV for repairs. Store it in a dry, cool place away from moisture and extreme temperatures.
Ignoring display settings right away leads to poor picture quality. Don’t assume the default settings are optimal for your room. Brightness, contrast, and color temperature all affect what you see on screen. Adjust these settings after your TV powers on for the best viewing experience.
Troubleshooting Common Smart TV Setup Issues
When you encounter problems during smart TV setup, staying calm and systematic helps you fix them quickly. Most issues have simple solutions you can try yourself before calling for help.
Remote pairing failures happen often. First, check if the batteries are dead or installed backwards. Replace them with fresh batteries and try pairing again while standing near the TV. Some remotes need you to hold a pairing button for several seconds. If it still won’t work, consult your TV’s manual for the specific pairing process.
Wi-Fi connection problems are another common headache. If your TV won’t find your network, move the TV closer to your router temporarily. Walls and distance weaken signals. Try connecting to your network again. If the connection drops frequently, restart your router by unplugging it for 30 seconds, then plugging it back in.
Picture quality issues often stem from incorrect display settings. Access your TV’s menu and check brightness and contrast levels. These settings should match your room’s lighting conditions. Adjust them slowly until the picture looks natural and clear.
Input source confusion causes blank screens. Your TV might be set to the wrong input. Use your remote to cycle through inputs until you see your cable box, streaming device, or game console appear on screen.
General freezing or lag usually clears with a power cycle. Unplug your TV from the outlet and wait a full 60 seconds. This resets the TV’s temporary memory and often solves glitches. Plug it back in and power it on normally.
If problems persist after trying these steps, check your TV manufacturer’s support website for additional guidance specific to your model.
Final Thoughts
Setting up a new smart TV feels like a lot at first. But when you break it into small steps, it becomes simple.
Planning ahead saves you time and stress. Think about your TV location before you unbox anything.
Connect your external devices first. Your cable box, game console, and home theatre system should link up before you power on the TV.
This order matters. It makes the rest of your setup faster and smoother.
Once everything is connected, turn on your TV and follow the setup wizard. Pair your remote, join your Wi-Fi network, and sign into your account.
Take your time with display settings too. A few small adjustments make a real difference in picture quality.
Mounting your TV the right way also matters. Find your wall studs and use proper hardware for a safe, secure fit.
Avoid mounting your TV too high. You want a comfortable viewing angle, not a sore neck.
Keep your original box if you can. It helps if you ever need to move or return your TV.
If something goes wrong, do not panic. Most issues have a quick fix.
Reset your input source if your screen looks blank. Replace remote batteries if pairing fails. A simple power cycle often solves lagging or freezing problems.
Smart TV setup is not complicated once you understand the basics. Prepare your space, connect your devices, and follow each step calmly.
With a little patience, your new TV will run smoothly. You will enjoy a better viewing experience right from the start.
Good setup habits now mean fewer headaches later. Take it one step at a time, and you will get it right.
Frequently Asked Questions
Should I connect everything before turning on my smart TV?
Yes, absolutely. Connect all external devices first. This includes your cable box, Blu-ray player, game console, or home theatre system. Plug them into the correct HDMI ports before powering on your TV. This approach prevents confusion during the initial setup wizard and makes the first power-on much smoother.
How do I pair my remote with the TV?
Most modern remotes pair automatically when you power on your TV. Hold the remote close to the TV during setup. Point it directly at the screen. If pairing fails, replace the batteries and try again near the TV. Some remotes require you to hold a specific button for a few seconds. Check your TV’s manual for exact pairing instructions.
What’s the best way to fix a blank screen after setup?
A blank screen usually means the wrong input source is selected. Press the input or source button on your remote. Cycle through the available inputs until you see your content. If this doesn’t work, power cycle your TV by unplugging it for 60 seconds. This simple step clears most temporary issues.
Why is my TV running slowly or freezing?
Freezing often happens during initial setup. Unplug your TV for one full minute, then plug it back in. This resets the system and clears temporary glitches. If freezing continues after setup, check your Wi-Fi connection strength. A weak signal can cause lag and performance problems.
Do I really need to keep the original TV box?
Yes, keep it if possible. The original packaging protects your TV during moves or if you need repairs. Store it in a safe, dry place. If space is limited, at least save the foam inserts and outer box.

Dillip is the founder and editor of MediaModHub.com, a passionate tech enthusiast dedicated to helping readers make informed decisions through honest product reviews, detailed comparisons, and practical buying guides. When he’s not testing the latest gadgets, he’s researching the tech trends that matter most to everyday consumers.