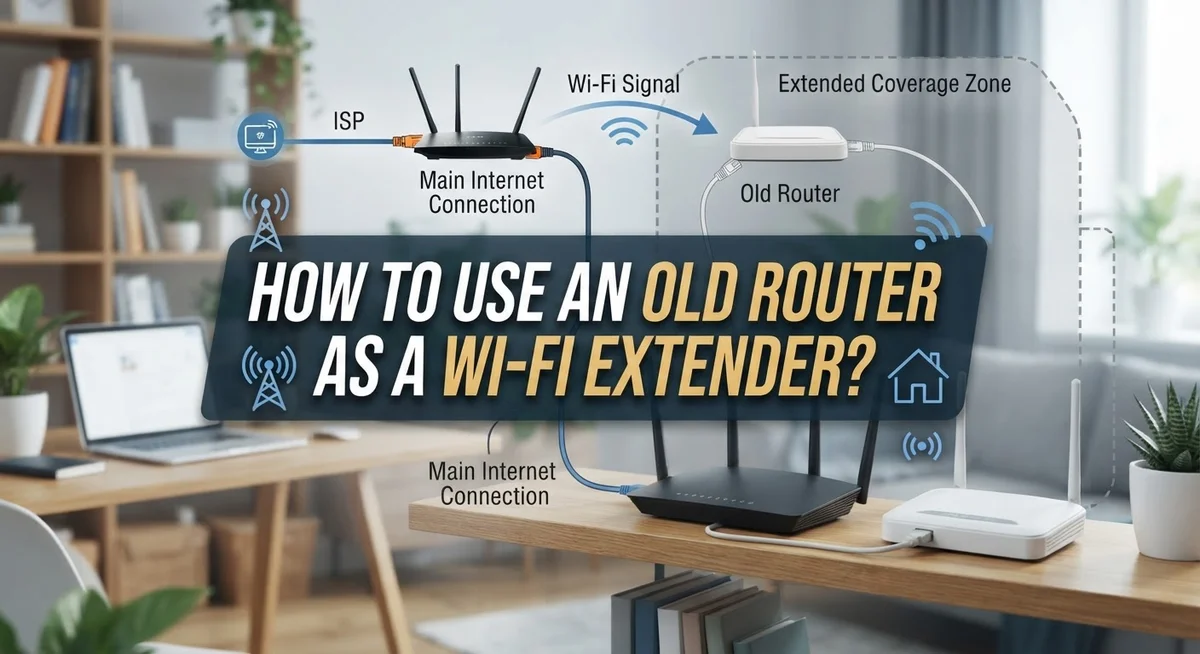
How to Use an Old Router as a Wi-Fi Extender?
Do you have an old router sitting in a drawer? Don’t throw it away just yet.
That dusty device can get a new life. You can turn it into a Wi-Fi extender for your home.
Many homes have dead zones. These are spots where the internet signal feels weak or drops out.
A second router can fix this problem for free. You do not need to buy new equipment.
This guide will show you how to set it up. We will cover the Access Point Mode and the Repeater Mode.
You will learn simple steps to get started. This includes resetting your device and finding the admin panel.
We will also compare wired and wireless setups. Knowing the difference helps you get the best speed.
Many people skip important steps when doing this. This often leads to a weak or unstable connection.
We will help you avoid these common mistakes. By the end, you will boost your Wi-Fi coverage easily.
Let’s turn that old gadget into a useful tool. It is easier than you might think.
In a Nutshell
Here is the quick summary if you are short on time.
-
Reset first. Always factory reset your old router before you start. This clears old settings and prevents connection conflicts.
-
Pick a mode. You can use Access Point Mode or Repeater Mode. Access Point Mode usually gives a more stable connection.
-
Connect and configure. Link the router to your computer using an Ethernet cable. Then log into the admin panel to change the settings.
-
Wired beats wireless. A wired connection is faster and more reliable than a wireless one. Choose wired setup whenever you can.
-
Test before you commit. Check your speeds in Access Point Mode first. This helps you spot problems early.
-
Avoid rookie errors. Do not skip the reset step. Do not guess your way through the admin panel.
Follow these steps, and your old router will fill in those annoying dead zones. It just takes a few minutes of setup to get a stronger signal all over your house.
Access Point Mode vs. Repeater Mode: What’s the Difference?
Access Point Mode and Repeater Mode are two different ways to use your old router. Understanding the difference helps you pick the right setup for your situation.
Access Point Mode works best when you have a wired connection available. You connect your old router to your main router using an Ethernet cable. This creates a new Wi-Fi network that broadcasts from a different location in your home. Your devices can connect to either network. The setup is straightforward and reliable.
Repeater Mode uses a wireless connection instead. Your old router picks up the signal from your main router and rebroadcasts it. You do not need an Ethernet cable for this method. However, repeater mode has a trade-off. It uses the same Wi-Fi channel, which can slow down your speeds. Think of it like a phone game of telephone where the message gets weaker each time it passes.
Here is the practical difference: Access Point Mode gives you better speed and stability. Your devices get a strong, direct connection through the wired link. Repeater Mode is more convenient since you do not need cables running across your home. It works fine for basic tasks like browsing or email. However, it struggles with streaming video or online gaming.
Most experts recommend testing Access Point Mode first if possible. Run a speed test to see how fast your connection gets. If you get good results, stick with it. If you need wireless setup only, then try Repeater Mode. Both modes work with most old routers, so your choice depends on what your home needs and what cables you can run.
What You Need Before Getting Started
Before you start turning your old router into a Wi-Fi extender, gather a few basic items. You will need the router itself, obviously, but also an Ethernet cable to connect it to your computer during setup.
Make sure you have access to your main router’s Wi-Fi network name and password. You will need this information to connect your old router wirelessly if you choose Repeater Mode. Write down these details so you do not forget them mid-setup.
Check that your old router still powers on. Plug it in and wait 30 seconds to see if the lights come on. If nothing happens, the device may be too old or broken to use as an extender.
You will also need a computer or laptop with an internet browser. This lets you access the router’s admin panel where you change settings. Any device with a web browser works fine for this step.
Think about where you want to place the extended router. Pick a location roughly halfway between your main router and the dead zone you want to cover. The placement affects how well your extension works.
Decide whether you want a wired or wireless setup. If you have an Ethernet cable running to your chosen location, a wired setup gives better performance. Wireless setups are easier to install but slower.
Finally, clear some time for the process. Setup usually takes 15 to 30 minutes total. You do not need any special technical skills, just patience and the willingness to follow each step carefully.
Step-by-Step: Resetting and Accessing Your Old Router
A factory reset clears all old settings from your router. This step is important because leftover configurations can cause problems during setup.
To reset your router, locate the reset button. This button is usually small and recessed into the device. You may need a paperclip or pin to press it. Hold the button for 10 to 15 seconds while the router is powered on. The lights will blink, indicating the reset is happening. Wait about two minutes for the router to restart completely.
Once the reset finishes, you need to access the admin panel. Connect your old router directly to a computer using an Ethernet cable. Open a web browser and type the router’s IP address in the address bar. Common addresses are 192.168.1.1 or 192.168.0.1. Check your router’s label if you are unsure which address to use.
A login screen will appear. Enter the default username and password. These credentials are usually “admin” and “admin” or “admin” and “password.” If these don’t work, check the router’s manual or the manufacturer’s website for correct defaults.
You should now see the admin dashboard. This is where you will find the mode settings. Look for options labeled “Repeater Mode,” “Extender Mode,” or “Access Point Mode.” Different manufacturers use different names, but the concept is the same.
Take your time with this process. Rushing through these steps often leads to errors. If you get stuck, restart the router and try again. Patience here saves frustration later.
Step-by-Step: Configuring Repeater or Extender Mode
Once your old router is reset and you can access the admin panel, it’s time to enable the repeater or extender mode. This is where the real setup happens.
Look for a section called “Wireless” or “Network Mode” in your admin dashboard. Different routers label this differently, but you’re searching for options like Repeater Mode, Extender Mode, or Wireless Bridge Mode. Click on that section.
You’ll see a dropdown menu with several choices. Select either Repeater Mode or Extender Mode depending on what your router offers. Both do similar jobs, but check your router’s manual if you’re unsure which one applies to your model.
Next, you need to choose your connection type. This is crucial. You’ll pick between a wired setup or a wireless setup. If you have an Ethernet cable running to your extended location, choose wired. This gives you better performance and stability. If wired isn’t possible, select wireless instead.
For a wireless setup, your router will scan for available networks. You’ll see your main router’s name appear in the list. Select it and enter your main router’s Wi-Fi password. This connects your old router to your primary network.
If you chose a wired setup, connect an Ethernet cable from your main router to the old router’s WAN port. The system automatically recognizes this connection.
After you make these selections, save your settings. The router will restart automatically. Wait about two minutes for it to fully boot up. Your extended network should now broadcast its own Wi-Fi signal. Check your available networks list on your phone or computer to confirm the new network appears. You’re almost done.
Wired vs. Wireless Setup: Choosing the Right Configuration
Your choice between wired and wireless setup determines how well your extended network performs. Each option has real advantages and real trade-offs you should understand.
Wired setup means you run an Ethernet cable from your main router to the old router’s WAN port. This connection gives you faster speeds and more stable coverage. The cable carries data directly, so your extended network doesn’t compete with your main network for wireless bandwidth. This setup works best if you can physically run a cable to your desired location. The main drawback is installation effort. You may need to drill holes, run cables through walls, or deal with visible wiring.
Wireless setup connects your old router to your main router using only Wi-Fi signals. No cables required. This makes placement easier since you can put the router anywhere within range of your main network. The downside matters significantly. Your old router receives data wirelessly and then broadcasts it wirelessly again. This splits your available bandwidth in half. You’ll notice slower speeds compared to wired mode. Interference from walls, appliances, or other networks also affects wireless setup more severely.
Here’s the practical reality: test your internet speed in both modes if possible. Measure the connection quality at your desired location before committing to wireless setup. If you need reliable streaming or video calls in the extended area, wired setup delivers better results. If convenience matters more than maximum speed, wireless setup works adequately for basic browsing and email.
Most people find that wired setup requires initial effort but pays off through consistently better performance. Wireless setup offers flexibility at the cost of reduced speeds.
Tips for Optimizing Speed and Coverage
After you configure your old router as an extender, speed and coverage depend on a few smart choices. Start by testing your connection speeds before finalizing your setup. Use a speed test tool on your computer or phone at different distances from both your main router and the new extender. This shows you exactly what performance you’re getting.
Position your extender strategically. Place it roughly halfway between your main router and the dead zone area. Avoid corners, closets, and metal objects. Open spaces with good airflow work best. The closer your extender sits to your main router, the stronger the signal it receives and passes along.
Choose wired connection when possible. If you can run an Ethernet cable from your main router to the old router’s WAN port, do it. This setup maintains full bandwidth since the extender doesn’t use Wi-Fi to communicate with your main router. Your speeds stay consistent and reliable.
Adjust transmit power settings. Many routers let you control how strong the wireless signal broadcasts. Set this to maximum for better coverage, but monitor for interference with neighboring networks.
Select the right Wi-Fi channel. Use a Wi-Fi analyzer tool to find which channels are least crowded in your area. Switch your extender to a different channel than your main router to reduce interference.
Keep your extender updated. Check the manufacturer’s website for firmware updates. These updates often improve performance and fix bugs.
Monitor your network regularly. Run speed tests monthly to catch any performance drops early. This helps you troubleshoot issues before they become serious problems affecting your daily internet use.
Common Mistakes to Avoid
People make several mistakes when converting an old router into a Wi-Fi extender. Understanding these errors helps you avoid frustration and get better results.
The first mistake is skipping the factory reset. Many users jump straight to configuration without clearing the old settings. This causes conflicts with your main router and prevents proper connection. Always reset your old router to its default state before starting.
Another common error is not accessing the admin panel correctly. Users struggle because they use the wrong IP address or forget the default login credentials. Check your router’s label for the default IP address, usually something like 192.168.1.1. Write down the username and password before you begin.
People often choose wireless setup without understanding the trade-off. While wireless setup seems convenient, it cuts your speed roughly in half. Your extender receives data from your main router wirelessly, then broadcasts it again. This double wireless transmission reduces performance significantly. Wired setup performs much better because it uses an Ethernet cable instead.
Placing the extender in the wrong location is another frequent mistake. Putting it too close to your main router wastes its potential. Positioning it too far away means weak signal strength. The best spot is roughly halfway between your main router and the dead zone area.
Finally, people forget to update the firmware after setup. Manufacturers release updates that improve stability and speed. Check the manufacturer’s website regularly for new firmware versions.
Avoiding these mistakes ensures your old router works effectively as an extender and provides reliable coverage throughout your home.
Troubleshooting Connection and Performance Issues
When your extended network isn’t working properly, you need to identify what’s going wrong. Connection drops happen when your old router loses its link to the main router. This usually means the signal is too weak or the placement isn’t ideal.
Start by checking your Wi-Fi signal strength between the two routers. Move closer to your main router and see if the connection stabilizes. If it does, your extender is simply too far away. Move it to a spot with better signal reception.
Slow speeds indicate a different problem. Your extender might be in repeater mode instead of access point mode. In repeater mode, the router handles traffic twice, which cuts your speed roughly in half. Switch to access point mode if you’re using a wired connection. This dramatically improves performance.
Another speed issue comes from channel interference. Your old router might be broadcasting on the same Wi-Fi channel as your main router. Log into the admin panel and switch to a different channel. Check which channels nearby networks use first.
Devices won’t connect to your extended network? This usually means the extender’s security settings don’t match your main router. Make sure both use the same password and security type (WPA2 or WPA3).
If problems persist, restart both routers completely. Unplug them for 30 seconds, then plug them back in. This clears temporary glitches that cause connection issues.
Finally, check your extender’s admin panel for error messages. These messages often point directly to the problem. Most connection issues resolve once you identify whether the problem is placement, settings, or mode configuration.
Final Thoughts
Turning an old router into a Wi Fi extender is a smart way to save money. You avoid buying new equipment. You also get better coverage in weak spots around your home.
The process is simple once you break it down. Reset the router first. Then log into the admin panel and enable extender mode.
Wired connections work best when you have the option. They give you faster speeds and fewer drop offs. Wireless setups work fine too, but expect some performance trade offs.
Testing matters at every stage. Check your speeds after each change you make. This helps you catch problems early before they affect your daily use.
Every home network is different. Your walls, devices, and router placement all affect results. Take time to experiment with different spots and settings.
Old routers often work better than people expect. Many models handle extender duties just fine, even if they feel outdated. Don’t assume you need brand new equipment.
This project also reduces electronic waste. Instead of tossing an old router, you give it new purpose. That’s a small win for your wallet and the environment.
Patience pays off here. Some setups work right away, while others need small adjustments. Stick with it, and you’ll likely see solid results.
Remember to revisit your setup occasionally. Networks change as you add new devices or move furniture. A quick check up keeps everything running smoothly.
In the end, an old router can become a reliable part of your home network. With the right steps, you get extended coverage without extra cost. That’s a practical solution worth trying.
Frequently Asked Questions
Can I use any old router as a Wi-Fi extender?
Most old routers work as extenders, but you should check your specific model first. Visit the manufacturer’s website and look for your router’s model number. Search for its admin panel login page or user manual. This tells you if your router supports Repeater Mode or Access Point Mode. Some very old routers may lack these features, but most modern ones from the last 10 years have them built in.
Is a wired connection better than wireless for extending Wi-Fi?
Yes, wired connections perform much better. When you connect your extender to the main router using an Ethernet cable, you get faster speeds and more stable coverage. Wireless connections split your bandwidth between receiving and sending signals. This means you lose speed. If you can run an Ethernet cable between your routers, do it. Your network will thank you.
What’s the difference between Repeater Mode and Access Point Mode?
Repeater Mode picks up your existing Wi-Fi signal and rebroadcasts it. This is wireless and simpler to set up, but it reduces speed. Access Point Mode connects to your main router via Ethernet cable and creates a new network. It performs better and keeps full speed. Access Point Mode works best if you can wire the routers together.
Why won’t devices connect to my extended network?
Check your security settings first. Your extender’s password and security type must match your main router. Log into the extender’s admin panel and verify these match exactly. Also restart both routers completely. Wait two minutes between restarts. If problems continue, check the admin panel for error messages or try a factory reset and reconfigure.

Dillip is the founder and editor of MediaModHub.com, a passionate tech enthusiast dedicated to helping readers make informed decisions through honest product reviews, detailed comparisons, and practical buying guides. When he’s not testing the latest gadgets, he’s researching the tech trends that matter most to everyday consumers.