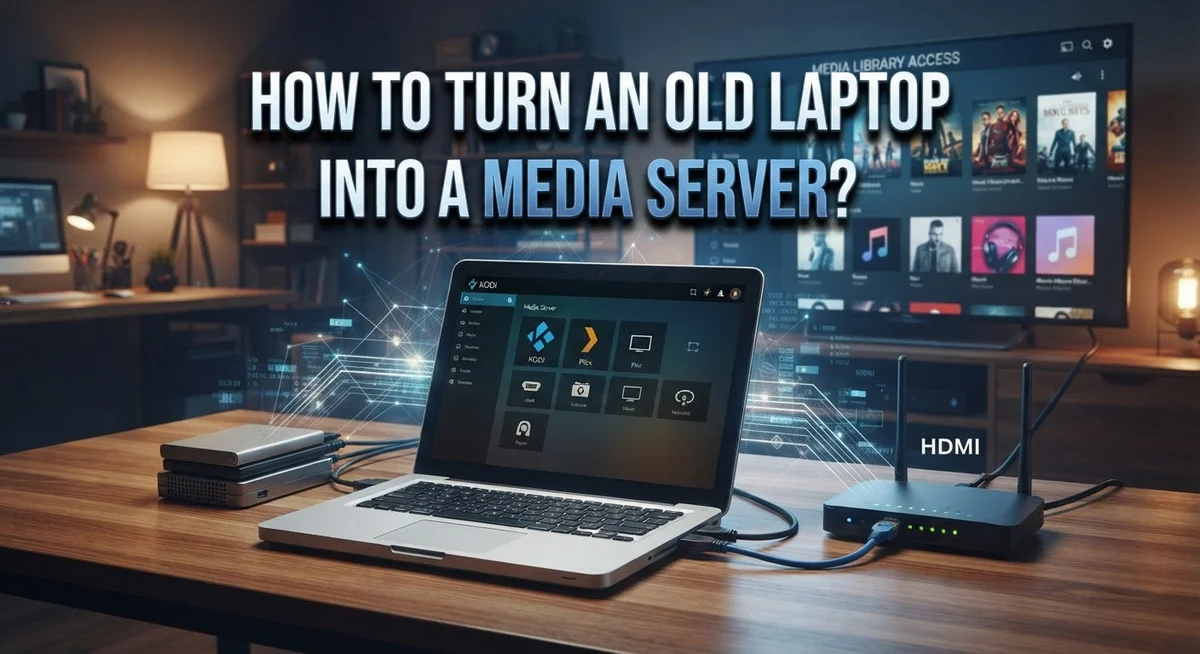
How to Turn an Old Laptop Into a Media Server?
Do you have an old laptop sitting in a drawer? Don’t throw it away just yet.
That dusty laptop can become a powerful media server. It can stream your movies, shows, and music to any device in your home.
You don’t need fancy hardware or a big budget. You just need a few simple steps and some free software.
This guide will show you how to turn that old machine into a home streaming hub. We will cover choosing the right operating system for aging hardware. Ubuntu Server works great for most older laptops.
We will also walk through installing media server software like Plex or Jellyfin. These tools help organize and stream your content easily.
You will learn how to add your media files and set up remote access. This means you can watch your favorite shows even when you’re away from home.
We will also share tips on power efficiency and avoiding common mistakes. Your old laptop can truly shine again with the right setup.
Let’s get started and breathe new life into that forgotten device.
In a Nutshell
Turning an old laptop into a media server is simple. Here is a quick rundown of what you need to know.
-
Pick a lightweight OS. Ubuntu Server 20.04 works great for older hardware. For very old laptops, choose a lighter Linux version.
-
Install media server software. Plex or Jellyfin are both good choices. They help you organize and stream your content easily.
-
Add your media files. Copy movies, shows, and music onto the laptop. Keep everything in clear, labeled folders.
-
Set up streaming access. Configure your server so you can watch content at home or remotely. This step usually takes just a few minutes.
-
Save power where you can. Enable power-saving settings and let hard drives sleep when idle. This keeps energy costs low.
-
Keep it simple. Start with just an OS, media server, and your files. Avoid overcomplicating things early on.
The whole process can take under an hour. You will get a functional home streaming hub without spending money on new equipment.
Is Your Old Laptop Good Enough? Checking Hardware Requirements
Before you start, check if your old laptop has what it takes. The good news is that media servers don’t need much power. Most older machines work fine for this job.
CPU and RAM matter most. Your laptop should have at least a dual core processor and 2GB of RAM. If it has 4GB or more, even better. Older processors run slower, but they still handle basic streaming. Don’t worry if your laptop is five or ten years old. It can still work.
Storage is your next concern. You need space for your media files. Check how much hard drive or SSD space remains. A 256GB drive works, but 500GB or larger gives you room for more movies and shows. If your laptop has a removable hard drive, you can add an external drive for extra storage.
Internet connection matters too. Your laptop needs a stable network link. A wired connection is better than WiFi. Ethernet cables give you faster, more reliable streaming. If WiFi is your only option, place the laptop close to your router.
Power consumption is real. Old laptops use more electricity than new ones. Check if your battery still holds a charge. You’ll likely keep it plugged in all the time. That’s fine, but be aware of the energy cost.
The honest truth. Your old laptop probably has everything needed. Older hardware runs lighter operating systems well. Performance limitations exist, but they’re manageable. Start simple and adjust as needed. Most people finish setup in under an hour with basic requirements met.
Choosing the Right Operating System for Your Laptop’s Age
Your old laptop’s age determines which operating system works best. Older machines struggle with modern, heavy systems. You need something lightweight that won’t drain your hardware’s resources.
Linux is your best friend here. It runs smoothly on aging laptops because it uses minimal memory and processing power. Ubuntu Server 20.04 is an excellent choice for machines that are five to ten years old. It strikes a good balance between stability and efficiency.
For laptops older than ten years, consider even lighter Linux versions. These stripped down systems skip unnecessary features and focus on core functions. Your laptop will run faster and use less electricity.
Windows and Mac present real challenges. Modern versions demand too much RAM and storage space. Older laptops often lack the power to handle them smoothly. Your media server will become sluggish and unreliable.
Check your laptop’s specifications before choosing an OS. Look at your processor type, RAM amount, and available storage. A machine with 2GB of RAM needs a different approach than one with 4GB or more.
Think about your laptop’s age and condition. Hardware degradation happens over time. Older machines may have failing hard drives or battery issues. A lightweight OS reduces stress on aging components and extends your device’s life.
The right operating system makes everything easier. Installation becomes faster. Performance improves noticeably. Your media server runs reliably without constant crashes or freezing. Spend time choosing wisely at this stage. It saves you frustration later.
You’re not stuck with one choice either. You can test different options before committing. Most Linux systems allow you to try them without permanent installation. This flexibility lets you find what works best for your specific hardware.
Step-by-Step: Installing the OS and Preparing Your Laptop
Preparing your old laptop to become a media server starts with choosing the right operating system. Your laptop’s age and hardware specs determine which OS will work best. Older machines struggle with modern operating systems that demand lots of RAM and storage space.
Linux is your ideal choice for this project. It runs efficiently on aging hardware because it uses minimal memory and processing power. Ubuntu Server 20.04 is an excellent option for laptops that are five to ten years old. For machines older than that, consider even lighter Linux versions designed specifically for low resource systems.
Before installing anything, back up your important files. You never know what might happen during the installation process. Use an external drive or cloud storage to keep your data safe.
Download the operating system from the official source. You will need a USB drive with at least 8GB of storage space. Use imaging software to write the OS file onto your USB drive. This creates a bootable drive that your laptop can start from.
Insert the USB drive into your laptop and restart the machine. Enter the boot menu by pressing the correct key during startup, usually F12 or ESC. Select your USB drive as the boot device and follow the installation prompts.
Keep the setup simple at first. Choose basic installation options rather than advanced features. You only need the core OS, nothing extra. Once the OS is installed, update all system packages and security patches. This protects your device and ensures everything runs smoothly.
The entire installation process takes about thirty minutes. Your laptop is now ready for media server software installation.
Setting Up Plex or Jellyfin: Installation and Initial Configuration
Once your operating system is ready, installing media server software is straightforward. You have two main open source options that work well on older hardware. Both options let you stream movies, TV shows, and music to devices around your home.
Start by opening your terminal or command line. You’ll need to download the media server software from official sources. Most distributions offer simple installation commands that handle everything automatically. The process typically takes just a few minutes.
After installation completes, open your web browser and navigate to localhost with the default port number. Your media server displays a setup wizard that guides you through initial configuration. Create a username and password for your account. This protects your media library from unauthorized access.
Next, point your media server to the folders containing your media files. You can organize content by movies, television shows, music, or any structure you prefer. The software scans these folders automatically and creates a database of your files. This indexing process may take time if you have a large library.
Configure basic settings like streaming quality and remote access permissions. Start with simple settings and adjust later as needed. Remote access lets you watch your content outside your home network, though this requires additional setup steps.
Don’t overcomplicate things during initial setup. Focus on getting the basics working first. You can explore advanced features like transcoding, user accounts, and automated backups after everything runs smoothly.
Test your setup by playing a file from another device on your network. Confirm that video and audio work properly. Once you verify everything functions correctly, your media server is ready for regular use.
Adding Media Files and Organizing Your Library
Your media library needs organization to work smoothly. Start by creating clear folder structures on your storage drives. Use simple naming conventions like “Movies,” “TV Shows,” and “Music” as your main categories.
Inside each folder, create subfolders for better sorting. For movies, organize by genre or year. For TV shows, use one folder per series with season subfolders inside. This structure helps your media server find and display content correctly.
Name your files consistently. Remove special characters and use standard formats. For example, use “Show Name S01E01” for episodes instead of random names. Your media server reads these names to display proper titles and artwork automatically.
Consider your storage setup carefully. Store frequently accessed files on faster drives if possible. Keep rarely watched content on slower external drives. This balance keeps your server responsive without wasting money on expensive storage.
Start small and add files gradually. Begin with just a few movies or shows to test everything. Once you confirm everything works, expand your library. This approach helps you spot problems early.
Create a backup plan for your media files. Old laptops can fail without warning. External hard drives or network backups protect your collection. Losing years of organized content is frustrating and preventable.
Don’t overthink the initial setup. Your media server software handles most organization automatically through metadata. Focus on creating logical folder structures that make sense to you. Add detailed information later if needed.
Keep file formats simple and standard. Use MP4 for videos and MP3 for music. These formats work everywhere without conversion issues. Your server streams them reliably to any device.
Configuring Remote Access and Streaming Settings
Remote access lets you stream media from anywhere outside your home network. This feature transforms your old laptop into a truly useful device that works beyond your living room.
Start by accessing your media server’s settings through its web interface. Look for the remote access or external access option in the main menu. Enable this feature to allow connections from outside your home network. Your media server will generate a unique address or code for remote streaming.
Configure your router to support this access. You’ll need to set up port forwarding, which directs internet traffic to your media server. Open your router’s admin panel using its IP address. Find the port forwarding section and enter the port number your media server uses. Point this port to your laptop’s local IP address. This process typically takes five to ten minutes.
Set appropriate streaming quality limits for remote playback. Lower quality settings work better over slower internet connections. Your media server software includes preset options like 1080p, 720p, or 480p. Choose based on your internet speed and how many people will stream simultaneously.
Create user accounts for family members or friends who need access. Most media server software lets you set permissions for each account. You can limit who sees certain content or restrict streaming quality per user.
Test your remote access from a different internet connection, such as mobile data. Open the media server app or web interface using your remote address. Play a file to confirm everything works properly. If streaming stutters or fails, reduce the quality setting further.
Keep your media server software updated regularly. Updates include security fixes that protect your remote access from unauthorized use. Check for updates monthly or enable automatic updates if available.
Optimizing Performance and Power Efficiency on Older Hardware
Old laptops have limited resources, so performance optimization matters. Your aging hardware needs smart adjustments to run smoothly as a media server.
Start by reducing background processes. Disable unnecessary services that consume CPU and RAM. Open your system settings and turn off visual effects, animations, and auto updates. These features drain power and slow down streaming. Keep only essential services running.
Monitor your CPU and memory usage regularly. Use system tools to check what’s consuming resources. If your laptop struggles, close browser tabs and other applications before streaming. Some older laptops have just 2GB to 4GB of RAM, so every bit counts.
Enable power saving modes to extend hardware life. Set your laptop to use a lower CPU frequency when not under heavy load. Reduce screen brightness or turn off the display entirely since you won’t watch it. Adjust hard drive sleep settings to spin down unused drives after 10 to 15 minutes of inactivity.
Upgrade storage strategically if possible. Replace mechanical hard drives with solid state drives for your operating system and media server software. This improves responsiveness significantly. Keep media files on external storage if your internal drive is full.
Limit simultaneous streams based on your hardware. Older processors struggle with multiple concurrent users. Start by allowing just one or two streams. Test your setup and gradually increase if performance remains stable.
Keep your operating system lightweight. Use minimal Linux distributions designed for older machines. Avoid resource heavy desktop environments. Strip away unnecessary features you won’t use.
These adjustments help your repurposed laptop deliver reliable service without overheating or crashing.
Common Setup Mistakes and How to Avoid Them
Many people make setup mistakes that cause frustration later. The most common error is overcomplicating things from the start. You don’t need advanced settings, custom plugins, or complex networking configurations right away. Start simple with just your operating system, media server software, and your media files. This approach works well and prevents headaches.
Another frequent mistake involves ignoring your hardware’s age and limitations. Older laptops have less processing power than modern machines. Running too many features at once will slow everything down or cause crashes. Test your setup with just a few files first. Add more gradually as you understand what your laptop can handle.
People often forget about power efficiency on aging equipment. Leaving your laptop running 24/7 without power management burns through electricity and damages old components faster. Enable sleep modes for your hard drives when they’re not in use. Set your system to reduce CPU speed during idle periods. These changes keep your electricity bills lower and extend your laptop’s lifespan.
Storage mistakes happen frequently too. Many users fill up their hard drive completely, which slows down performance dramatically. Leave at least 10 to 15 percent of your storage space empty. Your system needs this breathing room to function properly.
Finally, avoid skipping security updates for your media server software. Updates include important fixes that protect your system from vulnerabilities. Set updates to happen automatically if possible. This keeps your setup secure without extra effort on your part.
Start with basic configuration, monitor your hardware’s performance, and adjust as needed. This practical approach prevents most common problems before they start.
Final Thoughts
Turning an old laptop into a media server is a smart way to reuse hardware you already own. You don’t need fancy equipment or a big budget.
Just a laptop, some free software, and a bit of time will get you streaming.
Start simple. Install an operating system, add media server software, and load your files. This basic setup handles most home streaming needs.
Don’t rush into complicated configurations right away. Get the core system working first. You can always add features later once you understand how everything runs.
Pay attention to your hardware’s age. Older laptops have real limits on speed and power. Respecting these limits helps your server run smoothly instead of crashing or overheating.
Power efficiency matters more than people expect. Small changes, like enabling sleep modes and reducing background tasks, extend your equipment’s life and cut electricity costs.
Remote access opens up your library to family and friends anywhere. Take time to set this up properly, with sensible quality limits and secure accounts.
Regular maintenance keeps everything running well. Update your software, check performance now and then, and adjust settings as your needs change.
Mistakes happen, especially at first. The good news is that most setup errors are easy to fix once you spot them.
Building a media server from an old laptop teaches you practical tech skills. You’ll understand networking, storage, and software in a hands on way.
The result is worth the effort. You get a personal streaming service, save money on subscriptions, and give new life to hardware that might otherwise sit unused.
Take it step by step, stay patient, and enjoy the process. Your old laptop still has plenty to offer.
Frequently Asked Questions
What are the minimum requirements to start?
You need three things: an operating system, media server software, and storage space. Your old laptop’s processor and RAM determine how well it performs. Most older machines handle basic streaming without problems.
Start with a lightweight OS like Ubuntu Server. It runs smoothly on aging hardware. Then install free media server software. Finally, add your media files to a storage drive.
How long does the initial setup take?
Most people complete setup in under one hour. Installing the OS takes 20 to 30 minutes. Adding media server software takes another 15 to 20 minutes. Copying your first batch of files takes the remaining time.
The exact duration depends on your technical comfort level. Beginners might need a bit longer. Experienced users often finish faster.
Can I stream to multiple devices at once?
Yes, but older laptops have limits. Your processor determines how many people can watch simultaneously. Most older machines handle 2 to 3 streams comfortably.
Check your laptop’s CPU specs before expecting heavy use. Dual core processors struggle with many concurrent users. Quad core processors perform better. Monitor your system during playback to see what works best.
What storage options work best?
Solid state drives (SSDs) perform better than mechanical drives. They access files faster and consume less power. However, mechanical drives work fine if you’re patient with load times.
Consider using an external drive for your media library. This keeps your laptop’s main drive free for the operating system and software. External storage also makes it easy to upgrade later without replacing internal components.
Do I need special networking knowledge?
No. Basic setup requires no networking experience. You stream files locally at first, which is straightforward.
Remote access needs slightly more attention. You’ll configure basic settings to let family access your library from outside your home. Most media server software includes simple guides for this step.

Dillip is the founder and editor of MediaModHub.com, a passionate tech enthusiast dedicated to helping readers make informed decisions through honest product reviews, detailed comparisons, and practical buying guides. When he’s not testing the latest gadgets, he’s researching the tech trends that matter most to everyday consumers.