
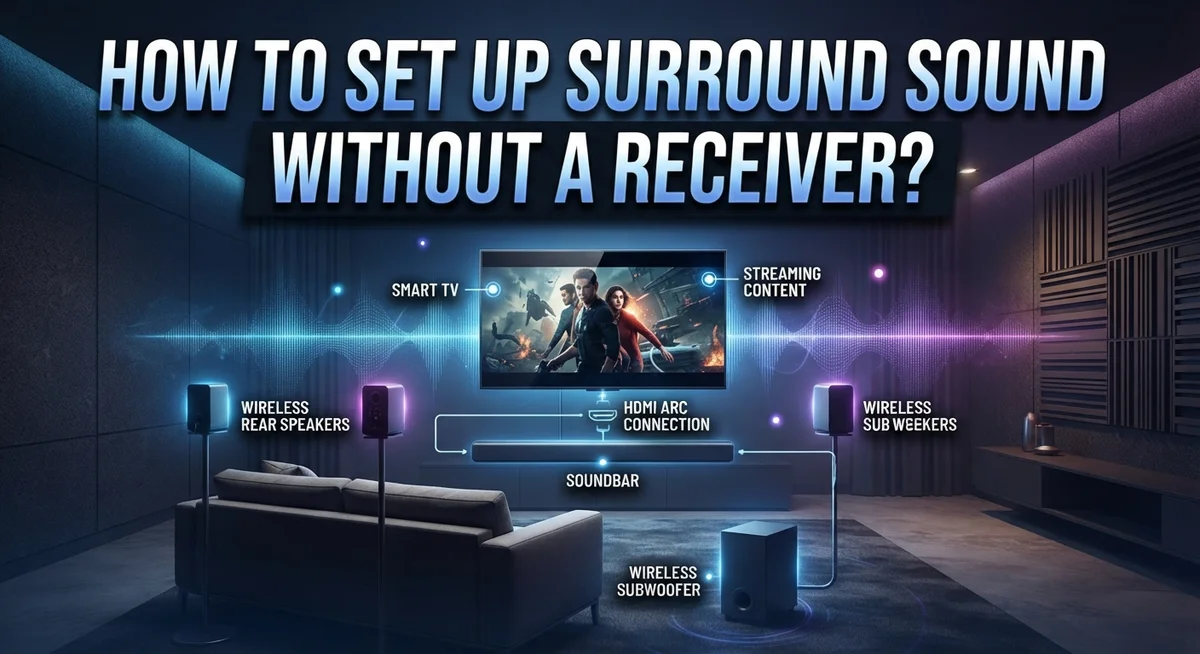
How to Set Up Surround Sound Without a Receiver?
Do you want big cinema sound without a bulky receiver taking up shelf space? You are not alone.
Many people think surround sound only works with a traditional receiver. That is not true.
You can still enjoy rich, immersive audio using other smart options. Devices like an AVR, a pre-processor unit, or a slimline receiver can power your speakers just as well.
The truth is simple: you do not need a classic receiver, but you do need some form of amplification. Sound has to come from somewhere, and speakers cannot power themselves.
This guide will show you how to build a surround sound system without a standard receiver. You will learn about the best alternatives, how to connect your speakers correctly, and how to avoid common setup mistakes.
By the end, you will understand exactly what your home theater needs. You will feel confident choosing the right gear for your space.
Let’s clear up the confusion and get your speakers working the right way.
In a Nutshell
Here’s the quick rundown before you start setting things up.
-
You still need power for your speakers. A true “no amplification” surround setup does not exist. Something has to drive your speakers.
-
Skip the classic receiver, not the concept. Swap it for an AVR, a pre-processor unit, or a compact slimline receiver instead.
-
Connections matter most. Plug your source inputs directly into your chosen amplification device. This step stays the same no matter which option you pick.
-
Speaker layout still counts. Pick a configuration that fits your room size and viewing setup, whether that’s a simple stereo pair or a full multi-speaker arrangement.
-
Match your gear to your needs. Choosing the right AVR or pre-pro depends on your speaker count, room size, and how you plan to use the system.
-
The big takeaway: You do not need a traditional receiver. But you do need some amplification or processing unit to make surround sound work properly.
What ‘No Receiver’ Really Means for Surround Sound
When people say “no receiver surround sound,” they usually mean skipping the traditional large black box that sits in entertainment centers. However, this phrase can create confusion because some form of amplification is absolutely required to power your speakers.
Think of it this way: speakers need electricity to produce sound. That electricity comes from an amplification device. A traditional receiver combines amplification, processing, and switching into one unit. When you remove the receiver, you are simply replacing it with a different amplification solution, not eliminating amplification altogether.
The key alternatives work like this. An AVR (Audio/Video Receiver) is still a receiver, just often more compact or streamlined than older models. A pre-processor unit handles audio and video switching without built-in amplification, meaning you add a separate amplifier. A slimline receiver takes up less space while keeping core functions intact.
Many people confuse “no receiver” with “no amplification.” This mistake leads to purchasing setups that cannot actually produce surround sound. Your speakers will not work without power, period.
The practical reality is simple: you need amplification, processing, or both. Your choice depends on your space and preferences. If shelf space is tight, a compact amplifier plus pre-processor works well. If you want everything in one device, a slim AVR solves the problem.
Understanding this distinction prevents costly mistakes. You are not eliminating equipment; you are choosing different equipment. Some options take less space. Some offer different features. Some cost less. But all working surround sound setups include some device that powers the speakers.
This is not a limitation. It is simply how audio systems function. Once you accept this reality, building your surround sound setup becomes straightforward and practical.
Understanding AVRs, Pre-Processors, and Slimline Receivers
An AVR (Audio/Video Receiver) is a powerful all in one device that handles both amplification and audio processing. It accepts multiple input sources like your TV, streaming device, or gaming console, then sends amplified signals to your speakers. Most AVRs decode surround sound formats automatically, making setup straightforward for most people.
Pre-processor units work differently. They handle only the audio processing and decoding part. A pre-processor takes your source signals, converts them to surround sound formats, then sends clean audio signals to a separate amplifier. This separation appeals to people who want flexibility or already own quality amplifiers. You control the amplifier separately, giving you more customization options.
Slimline receivers are compact versions of traditional receivers. They fit in tight spaces and still provide both amplification and processing in one unit. The trade off is reduced power output compared to full size receivers. Slimline models work well for smaller rooms or when shelf space matters more than maximum volume.
Here’s the practical difference: An AVR does everything in one box. A pre-processor needs a separate amplifier to function. A slimline receiver is a smaller AVR with less power.
Your choice depends on your specific situation. Choose an AVR if you want simplicity and have average power needs. Choose a pre-processor if you already own a quality amplifier or want to upgrade components independently later. Choose a slimline receiver if space is limited but you still want an all in one solution.
All three options eliminate the need for a traditional large receiver while still providing the amplification and processing your surround sound system requires. Each approach connects to your speakers and source devices the same basic way. The main difference is how they organize their internal components and how much customization they offer you.
Choosing the Right Speaker Configuration
Speaker configuration determines how sound reaches you from different angles. Your room size and layout matter most when choosing what works best.
Start with your room dimensions. Small rooms work well with 2.1 or 3.1 setups. Medium rooms benefit from 5.1 configurations. Large rooms can handle 7.1 or more speakers. Bigger doesn’t always mean better. You need enough space for speakers to create clear sound separation.
Consider your viewing position. Surround speakers work best when placed to the sides or slightly behind your seating area. Front speakers should be at ear level or slightly above. Subwoofers can sit in corners or along walls. The goal is balanced sound from all directions without obvious gaps.
Match speaker types to locations. Front left and right speakers handle most dialogue and music. Center speakers focus on voices and on screen action. Surround speakers add ambient effects and directional audio. Subwoofers reproduce low frequencies you feel in your chest.
Think about your amplification device. AVRs and pre processors have different channel outputs. A 5.1 system needs five speaker channels plus a subwoofer output. A 7.1 system requires seven channels. Count your amplifier’s available outputs before buying speakers.
Account for cable runs. Plan where wires will travel from your amplification device to each speaker location. Long runs need thicker cables. Wall placement affects cable routing options.
Test your layout first. Use temporary speaker placement before installing anything permanently. Move speakers around your room. Listen from your main seating spot. Adjust positions until sound feels balanced and immersive.
Start simple and expand later. Begin with a basic 3.1 or 5.1 configuration. Add surround speakers once you understand your room’s acoustics. This approach saves money and lets you learn what works for your space.
Step-by-Step: Connecting Your Sources and Speakers
Start by identifying all your audio sources. These include streaming devices, gaming consoles, Blu ray players, cable boxes, or turntables. Write down each one so you know exactly what needs to connect to your amplification device.
Next, gather your cables. You’ll need RCA cables or optical/digital cables depending on your source devices and your AVR or pre processor inputs. Check what connection types your sources support before purchasing cables.
Connect your sources to the amplification device first. Most AVRs have multiple input options on the back panel. Plug each source into a labeled input so you can easily switch between them. Label everything clearly to avoid confusion later.
Now focus on your speakers. Identify where each speaker will sit in your room. Front left and right speakers go beside your TV or screen. The center speaker sits directly above or below it. Surround speakers mount to the sides or slightly behind your seating area.
Run speaker cables from your amplification device to each speaker location. Plan your cable routes carefully to avoid tripping hazards or damage. Use cable management tools to keep wires organized and hidden when possible.
Connect each speaker to its corresponding amplifier output. Match the color coded terminals or follow the manual instructions. Ensure positive and negative connections are correct on each speaker.
Test your setup by playing content through each speaker individually. Adjust volume levels so all speakers sound balanced. Most AVRs have calibration features or apps that help with this process.
Finally, configure your amplification device’s settings. Select your speaker configuration in the menu. Tell it how many speakers you have and their placement. This ensures sound routes correctly to each speaker during playback.
Your surround sound system is now ready to use without a traditional receiver taking up space in your entertainment area.
Powering and Calibrating Your Setup Correctly
Powering your surround sound setup requires understanding your amplification device’s capabilities. Whether you choose an AVR, pre-processor, or slimline receiver, each one delivers power differently to your speakers.
First, check your amplification device’s power output specifications. Most systems need between 50 to 100 watts per channel for average room sizes. Larger rooms may require more power. Match this output to your speakers’ power handling ratings to avoid damage or poor sound quality.
Next, verify the number of available channels on your amplification device. A basic surround system needs at least 5 channels (front left, center, front right, surround left, surround right). Some devices offer 7 or more channels for expanded configurations. Count your speakers before purchasing any equipment.
Calibration starts with speaker placement verification. Ensure each speaker connects to the correct channel output. Front speakers handle dialogue and music. Surround speakers add ambient sound and directional effects. Subwoofers connect to dedicated bass outputs.
Use your amplification device’s built in calibration tools if available. Many systems include automatic room correction features that adjust sound levels and timing based on your space. This process typically takes 5 to 10 minutes and significantly improves audio quality.
Set your speaker levels manually if automatic calibration isn’t available. Play test tones through each speaker individually. Adjust the volume until all speakers sound equally loud from your main listening position. This ensures balanced sound throughout your space.
Test your setup thoroughly before finalizing everything. Play movies and music through different speakers. Listen for consistent volume and clear sound from all directions. Make small adjustments to speaker placement or level settings as needed.
Proper power management and calibration create a professional surround sound experience in your home.
Common Mistakes to Avoid
Many people think they can skip amplification entirely when setting up surround sound. This is the biggest mistake you can make. Every surround sound system needs some device to power and process audio signals. Without amplification, your speakers simply won’t produce sound.
Another common error is confusing what “without a receiver” actually means. You don’t need a traditional full-sized receiver, but you absolutely need an alternative like an AVR, pre-processor, or amplifier. These devices are essential for distributing audio to multiple speakers.
Some people attempt to connect speakers directly to their TV. TVs have weak built-in speakers and minimal audio outputs. They cannot power surround speakers or deliver the channel separation your system needs.
Underestimating power requirements causes real problems. If your amplification device doesn’t have enough wattage, speakers sound weak or distorted. Always check your speaker specifications and match them to your amplification device’s output. This prevents damage and ensures proper performance.
Improper cable management creates another frequent issue. Running cables carelessly leads to signal interference and poor audio quality. Plan your cable routes before installation and keep them organized.
Ignoring channel configuration is a setup killer. Your amplification device must have enough outputs for your speaker configuration. A 3.1 system needs at least three channels. A 5.1 system requires six channels. Count your channels before purchasing equipment.
Many people skip calibration entirely. This leaves their system sounding unbalanced. Spend time adjusting speaker levels and distances through your amplification device’s settings. This step makes a huge difference in sound quality.
Finally, don’t assume all cables work the same way. Use proper speaker cables rated for your setup. Cheap or damaged cables reduce audio quality significantly.
Avoiding these mistakes ensures your receiver-free surround sound system sounds great and operates reliably for years.
Troubleshooting Typical Setup Issues
When you set up surround sound without a traditional receiver, problems often appear during the installation process. Understanding these issues helps you solve them quickly and avoid frustration.
One major problem occurs when speakers produce no sound at all. This usually means your amplification device isn’t receiving the correct signal from your source. Check that your cables connect properly to both your source and your amplification unit. Verify your amplification device is turned on and set to the right input channel. Sometimes the volume is simply too low to hear anything.
Uneven sound levels across speakers create another common headache. Your amplification device may have different output levels for each channel. Access your amplification device’s settings menu and adjust individual channel volumes. Most devices let you raise or lower specific speaker outputs. Test each speaker separately while making these adjustments.
Crackling or distorted audio signals indicate connection problems. Loose cables cause this issue frequently. Inspect every connection point where cables meet your amplification device and speakers. Tighten any loose connections firmly. Also check that your cables aren’t damaged or frayed.
Some users experience surround speakers that don’t activate during movies. Your content source may not include surround sound information. Try playing different movies or music files to test this. Verify your amplification device is set to decode surround formats properly. Check your source device’s audio output settings.
Speaker placement mistakes lead to poor sound quality overall. Speakers positioned too close together or too far apart create dead zones where sound disappears. Refer to your amplification device’s manual for recommended speaker distances. Most systems work best when surround speakers sit 1 to 2 feet higher than ear level.
These troubleshooting steps address most setup issues you’ll encounter. When problems persist, review your amplification device’s manual for specific guidance on your model.
Final Thoughts
Setting up surround sound without a traditional receiver is totally possible. You just need the right amplification device to make it happen.
An AVR or a pre-processor unit does the same job as a receiver. These devices power your speakers and manage all your audio channels.
Slimline receivers work great too. They save space while still giving you full surround sound control.
The most important thing is understanding your power needs first. Check how many channels your device supports before buying speakers.
Many people make the mistake of thinking they can skip amplification completely. This never works because speakers need power to function properly.
Your speakers cannot connect directly to a TV and produce real surround sound. TVs simply don’t have enough power or channels for this job.
Take time to plan your speaker configuration carefully. Match your speaker count to what your amplification device can handle.
Calibration matters just as much as the initial setup. Test every speaker to confirm sound quality and correct channel placement.
Cable quality also plays a big role in performance. Cheap or damaged cables cause distortion and connection problems down the line.
Troubleshooting becomes easier once you understand how your system works. Most issues come from loose connections or incorrect channel settings.
The bottom line is simple. You don’t need a bulky traditional receiver, but you absolutely need some form of amplification.
Choose an AVR or pre-processor that fits your space and budget needs. Focus on power output, channel count, and calibration features.
With the right device in place, your surround sound system will deliver rich, immersive audio for years. Take your time during setup, and your home theater experience will pay off.
Frequently Asked Questions
Can I really set up surround sound without any receiver at all?
Not exactly. You need some form of amplification and processing device to power your speakers and handle the surround sound signal. A traditional receiver isn’t required, but alternatives like an AVR or pre-processor unit are essential.
Think of it this way: speakers need power to work. Your TV alone cannot provide this power for surround sound. You must have a device that amplifies the signal and routes it to multiple speakers.
What’s the difference between a receiver and an AVR?
An AVR (audio/video receiver) does what a traditional receiver does. It amplifies audio signals and processes video too. The main difference is size and features.
A traditional receiver is often larger and packed with extra features. An AVR gives you the core functions you need in a more compact form. For surround sound, both work equally well.
Do I need a pre-processor unit instead?
A pre-processor handles the signal routing and decoding but doesn’t amplify audio. You would need separate amplifiers to power your speakers if you choose this route.
This setup works, but it adds complexity and extra equipment. Most people find an AVR simpler and more practical for home use.
Can slimline receivers work for surround sound?
Yes, absolutely. Slimline receivers are compact alternatives that deliver full surround sound capability. They take up less space than traditional receivers while handling multiple speaker channels.
Check the power output specs to ensure it matches your speaker requirements. Slimline units work great for smaller rooms or tight spaces.
What happens if I connect speakers directly to my TV?
Your TV cannot power surround sound speakers properly. TVs output very weak audio signals designed for their built in speakers only.
You’ll get no sound, distorted audio, or damage to your equipment. Always use an amplification device between your TV and speakers.

Dillip is the founder and editor of MediaModHub.com, a passionate tech enthusiast dedicated to helping readers make informed decisions through honest product reviews, detailed comparisons, and practical buying guides. When he’s not testing the latest gadgets, he’s researching the tech trends that matter most to everyday consumers.


